After setting up the computers with BOINC and a fixed IP address, you can continue.
Get the BoincTasks M app
Add computers
Automatically (on WiFi network only)
This will only work if your computers are on the same local Wi-Fi network.
Press ![]() and select Find Computers.
and select Find Computers.
The Add Permissions screen will initially be shown. Now, click on Location and select Allow only while using the app.
This permission is needed to obtain the local IP address.
If you don’t see an IP address, press Cancel and try again.
Otherwise, proceed to the next chapter, “Manually.”
Next, press Find and wait until the scan is complete.
In general, adding a password is not necessary to find computers.
After a few minutes, the Found Computers dialog box will appear.
Press Add to add the found computers to the list.
Repeat if you have computers connected to another port.
Manually
Press ![]() and select Add computer.
and select Add computer.
Enter an IP address from either the local or public network.
In most cases, an URL that provides an IP address will work, such as “xxx.xxx.com” or “efmer”.
Symbols
To the left of “Tasks,” for example, you will see the following symbols:
▆ Wait, time between fetching new data, set in “BoincTasks settings“.
⇊ Fetching new data from BOINC.
⧗ and a fast spinning ◐ indicates that the computer is waiting for a response. This may take a while if the connection is (temporarily) lost.
Modify a computer
Select ![]() Computer.
Computer.
Select a computer and make the changes.
Remove a computer
Click on the computer that you want to remove.
Uncheck “Enabled” and press “Delete.”
Switching tabs
Select ![]() and choose a tab. This option is only available if you have at least one connected computer.
and choose a tab. This option is only available if you have at least one connected computer.
When the screen is wide enough, buttons appear automatically to switch tabs.

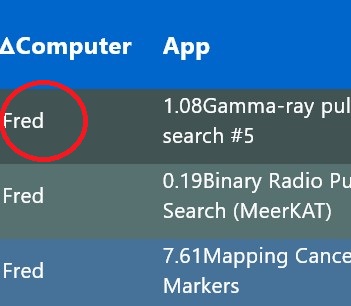
Tasks
You can select a task by clicking on it.
Tasks are grouped together in a filter item and shown as “Filter” with a number.
Press on a filter to view the combined tasks.
To pause a task, for example, a task press on ![]() followed by Suspend or use
followed by Suspend or use ![]() .
.
Sorting
1 ▲ ▼ Sort first, selected by pressing on the header.
2 ᐃ ᐁ Sort by last. Select this option by long pressing on the header.
Sort by priority: first (1) and last (2).
Adjusting header width
Select ![]() and choose “Header” -> “Adjust header width“.
and choose “Header” -> “Adjust header width“.
Then, go to the tab you want to adjust.
Click on the header item and drag it left or right.
When you are finished, uncheck the “Adjust header width” box.
BoincTasks settings
Select ![]() and choose “BoincTasks settings“.
and choose “BoincTasks settings“.
Set the refresh time, dark mode or enable the debug mode, to log more information.
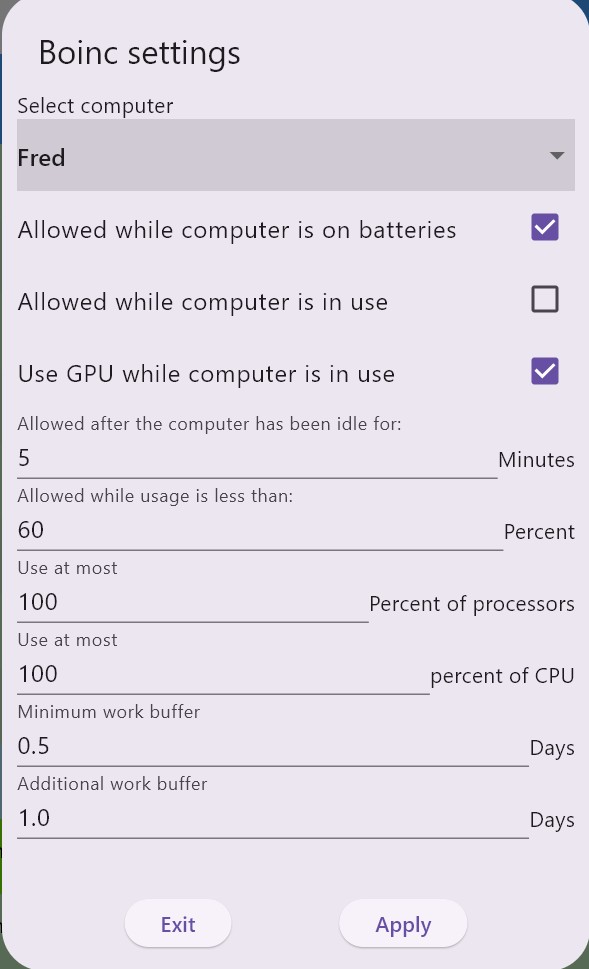
BOINC settings
Select ![]() and choose “BOINC settings”
and choose “BOINC settings”
After making any changes, click Apply.
Light and Dark mode
See BoincTasks settings above.
Set the color
Select ![]() and choose “Set color”.
and choose “Set color”.
Note that different colors are used for dark and light modes.
You can adjust the striping (alternating dark and light) from none to more in the upper left corner.
Change the color to your liking.
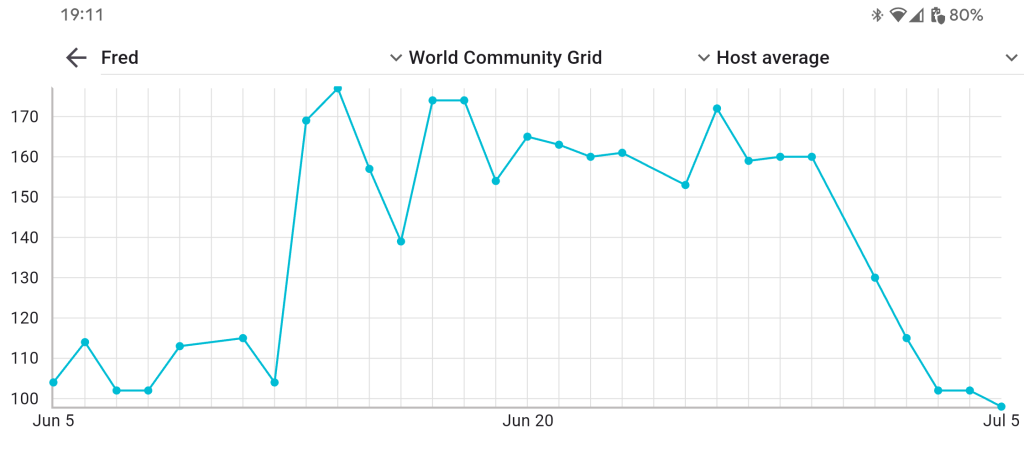
Credits Graph
Select ![]() and choose “Show graph”.
and choose “Show graph”.
Now, select a computer, project, and type, such as “Host Average.”
Logging
Select ![]() Show logging.
Show logging.
Collapse – hide computers
With a high amount of tasks, this is a way to remove the clutter.
First click on computrer on any row.
This will combine all rows into a single line.
Clicking on any point in the single single line will expand all rows for that computer.

Rearrange the header.
Select ![]() and choose “Header” -> “Task header “
and choose “Header” -> “Task header “
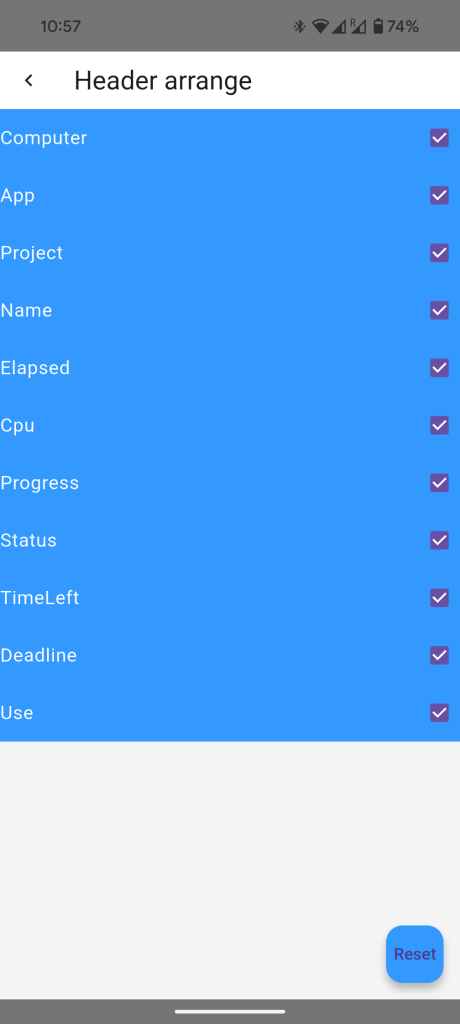
Now, you can drag columns to the desired location.
Uncheck header items that you don’t want to see.
Click the reset button to return to the default settings.
Allow to run.
This allows you to adjust the behavior of the CPU, GPU, or network on a selected computer.
Press ![]() or use the Computers button if available, and select “Boinc Allow.”
or use the Computers button if available, and select “Boinc Allow.”

Next select the computer.

Next you can choose from:
- Based on preference
- Always
- Never/Snooze
Preference: Run or use as set by the BOINC settings.
Always: Run the CPU, GPU or allows Network communication always.
Never: Never run the CPU, GPU or allows Network communication.
Pressing the snooze button at the end starts a 60-minute cycle of Never, which reverts back to the initial setting.
It essentially stops the CPU, GPU, or network communication for an hour.
After the snooze button is pressed, it becomes disabled and displays the remaining time in minutes.

To abort the snooze, select “Preference” or “Always.”
Timeout
The app needs time to resolve a lost connection.
A fast-spinning ◐ is a sure indicator that something has changed and the App is waiting.
If this happens frequently you can adjust the timouts to speed things up.
Go to ![]() “BoincTasks Settings“:
“BoincTasks Settings“:
- Main timeout: The main loop attempts to reconnect after this time.
- Reconnect Timeout: After this time, the app will either try to reconnect or remove any computers that are not connected.
- Socket Timeout: It must be less than the reconnect timeout, which is the maximum time for BOINC to respond to a request.
IIf you change the socket timeout, you must restart the app by going to and selecting “Restart app“).
This is how it works:
Connection loop: Checks for new computers and lost connections.
The “reconnect timeout” prevents the connection loop from stalling and restarts it after the timeout period, regardless of the situation.
Main loop: Runs more or less independently of the connection loop and sends requests to all connected computers.
A socket handles the connection and can stall, or become unresponsive. The socket timeout prevents this stall.
These timeouts also trigger the connection loop to start earlier.
Connecting to the Internet via your local network
There are several ways to connect to your local network when you are not connected to Wi-Fi.
Read here to connect from your mobile Internet or WiFi.
Reconnect or restart.
In general, everything is handled automatically, but…
Putting BoincTasks in sleep mode (display off) often by pressing the power button triggers a reconnect, which is a faster way to add a new or remove a lost computer.
Another way is to go to ![]() and select “Restart app”.
and select “Restart app”.
About
Find more information on our website.
Request changes or additions on the GitHub ![]() page.
page.
Report problems on the GitHub ![]() page.
page.